Season 2's faction upgrade system spans six factions, over 240 upgrade tiers, and dozens of salvage materials. Keeping track of what you've unlocked, what you need, and where to get it is the biggest obstacle between you and max rank. I built the Progression Tracker to handle all of that in one place. Here's how to use it to make your Season 2 grind as painless as possible.
The Four-Step Workflow
Step 1: Input Your Starting Data
Open the Progression Tracker. The Your Materials / Ranks card at the top is where all your session data lives. It has two sections:
- Faction Ranks - a grid with all six factions. Set your current rank for each. Ranks go 1-30, then VIP 1, VIP 2, etc. (type 32 and it'll show VIP 2). If you're not sure, you can leave them at 0 - rank-lock indicators won't show until you start tracking.
- Materials - your salvage inventory. Use ± buttons or type directly. Three views: Goals (materials you still need for your current goals), All Materials (everything), and By Faction (per-faction breakdown).
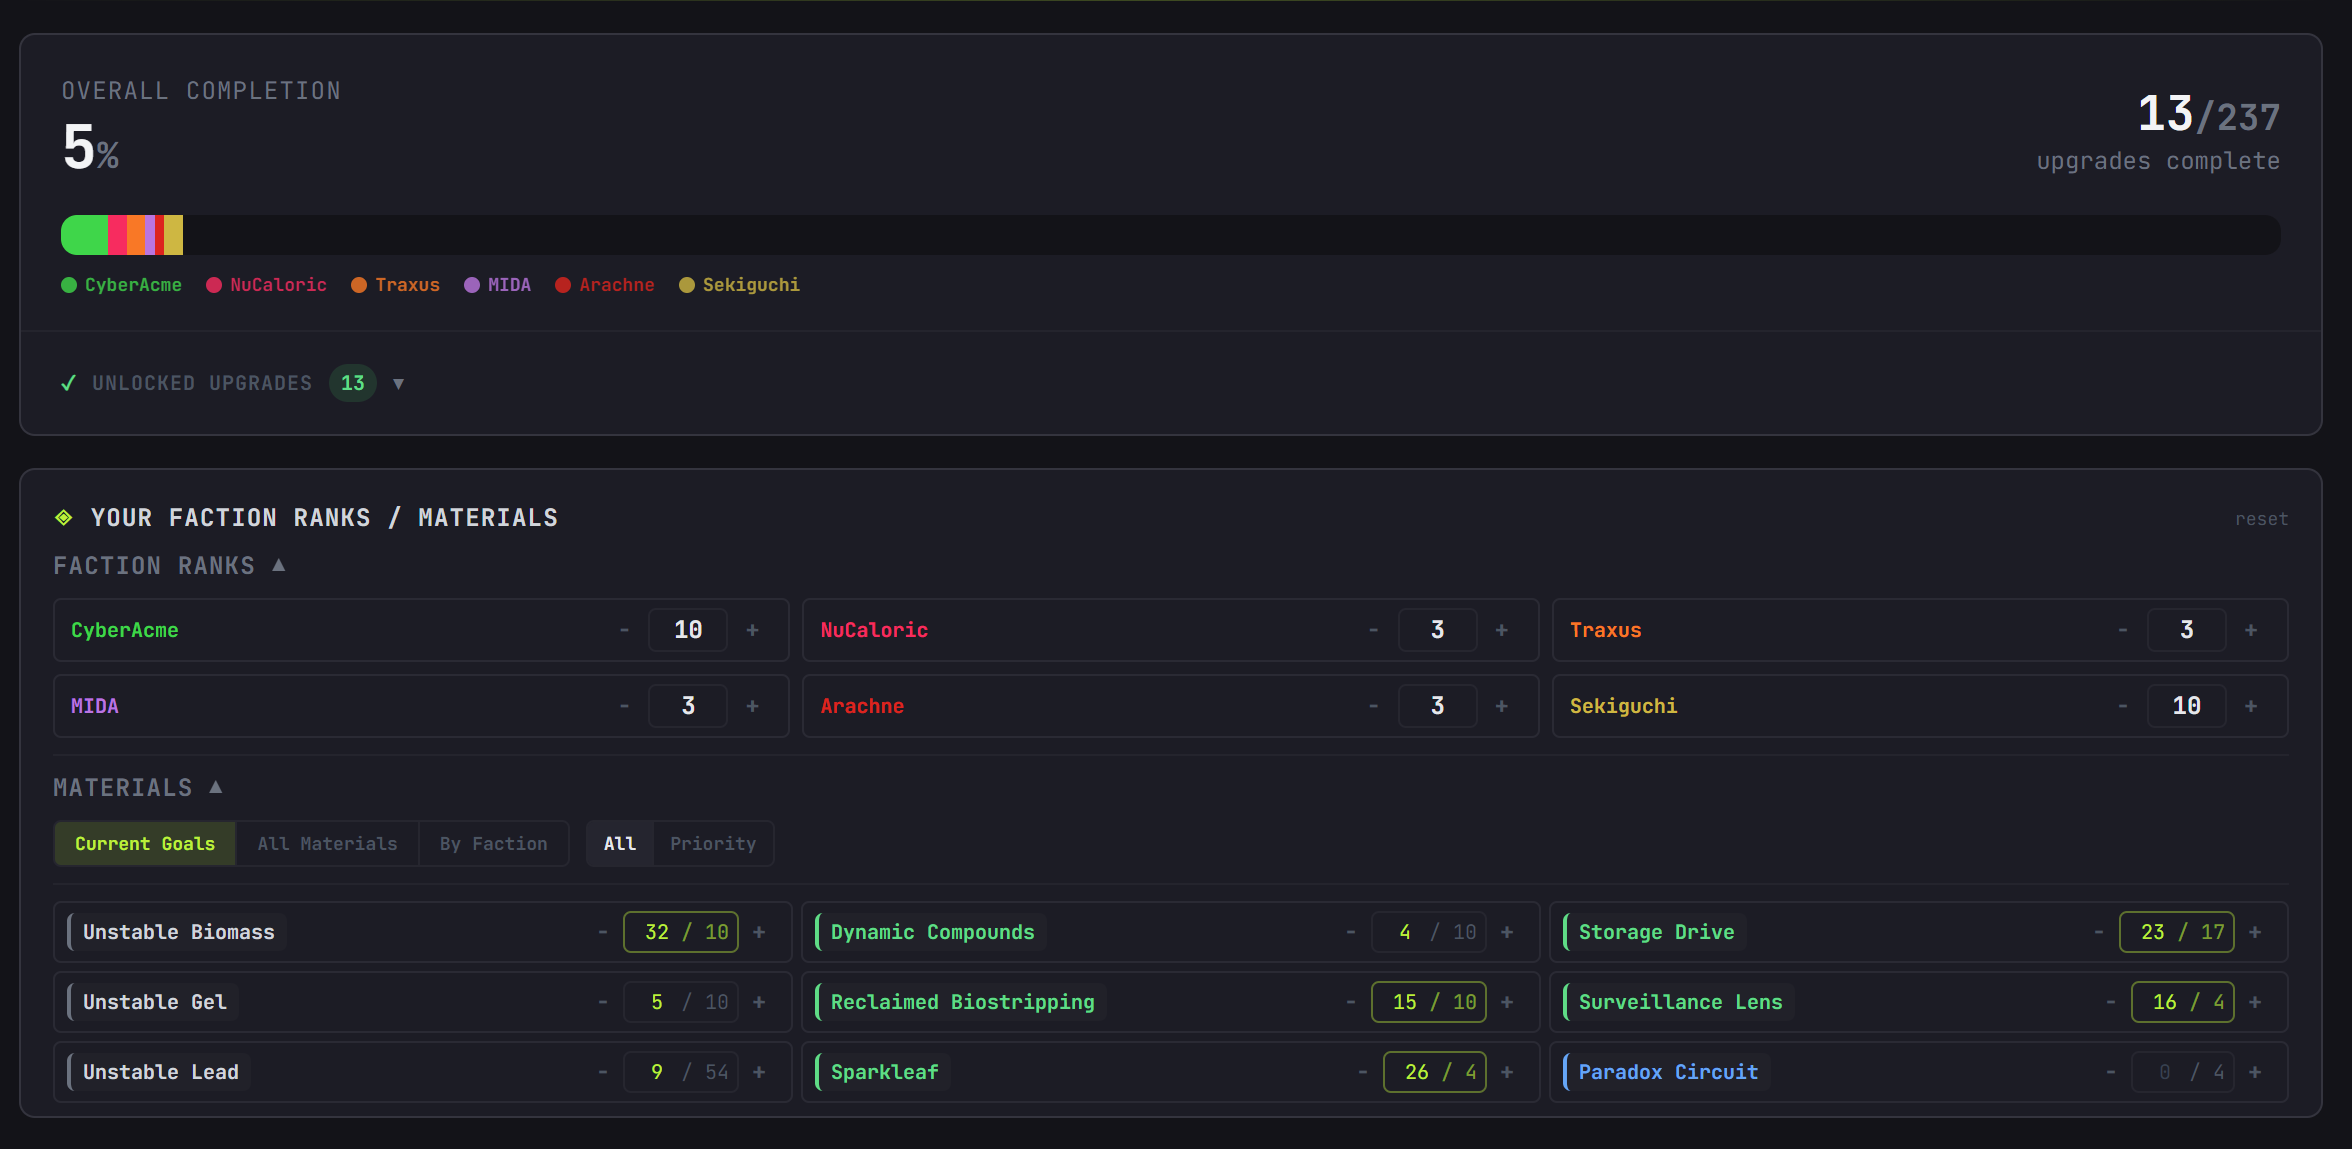
Don't worry about getting every material perfect on your first try. Just set the ones you know and adjust as you play.
By signing into Bungie you will be able to track everything across multiple devices. This isn’t required, but without doing so you’ll only be able to track on your current device - data won’t be synced to other devices!
Step 2: Set Goals in the Faction Upgrades Tab
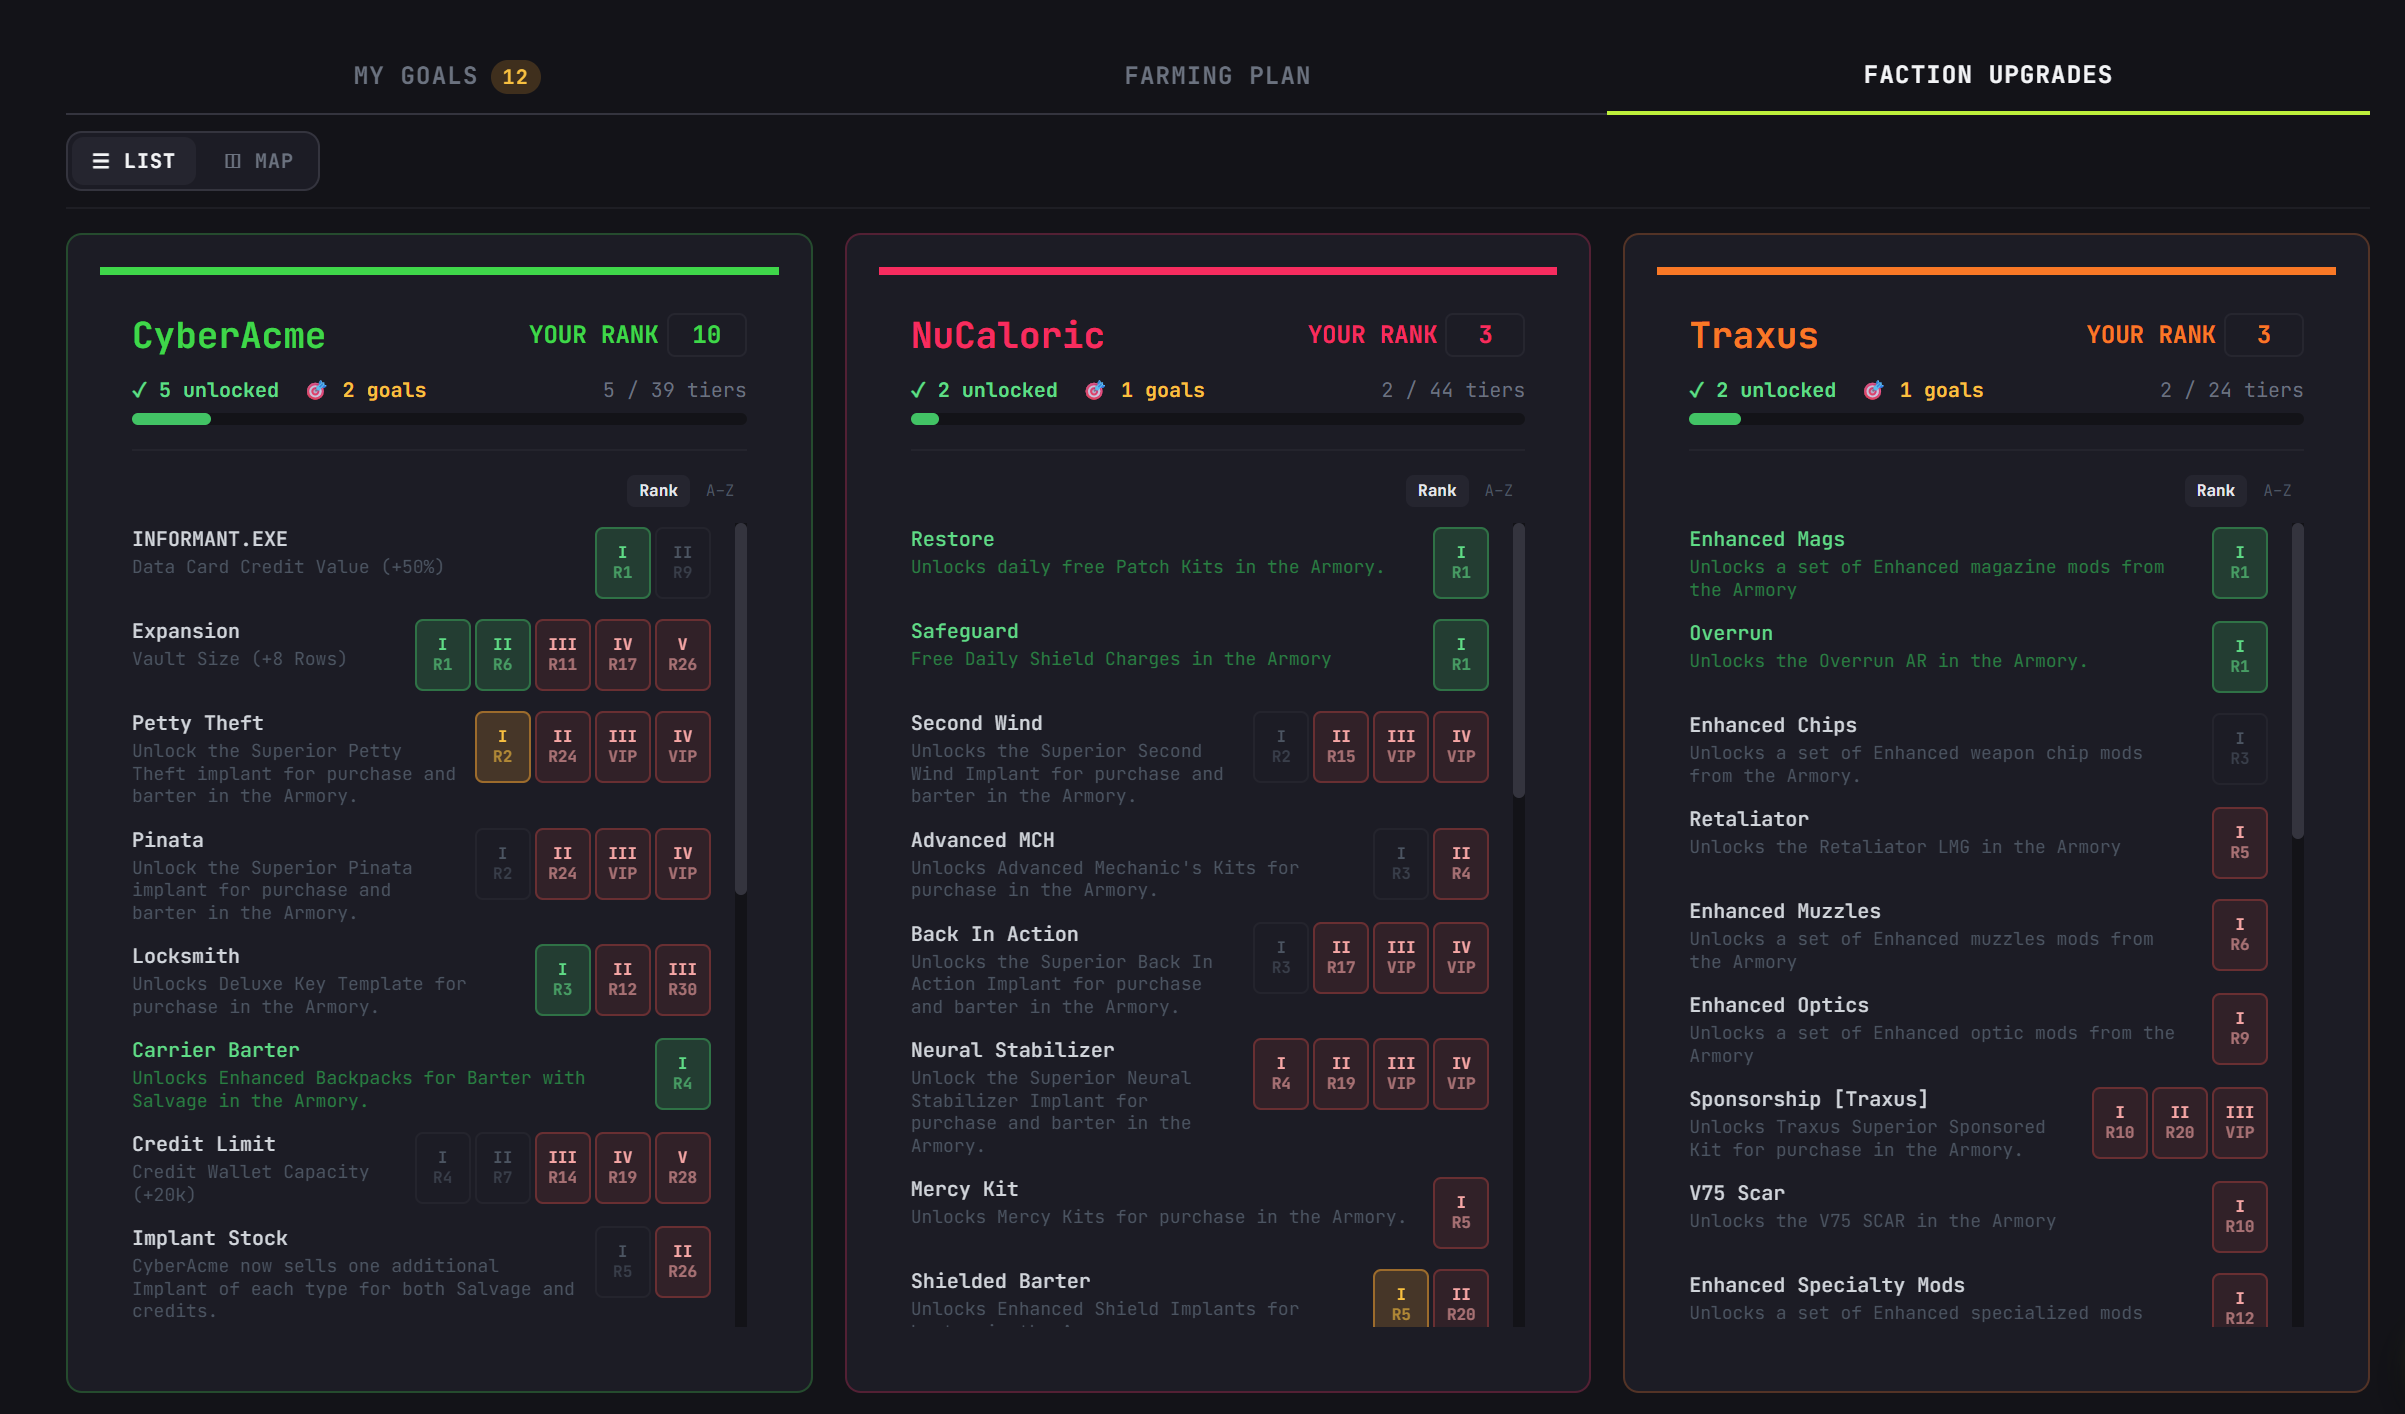
Switch to the Faction Upgrades tab. Browse any faction's upgrade tree in Map or List view. List View is meant to be a quick overview of all the upgrades in the game, broken down by Faction. You can sort the upgrades by lowest required tier first, or alphabetically. Click a tier to mark is as unlocked or to set it as a goal. Marking a higher tier as unlocked will set all lower tiers as unlocked as well!
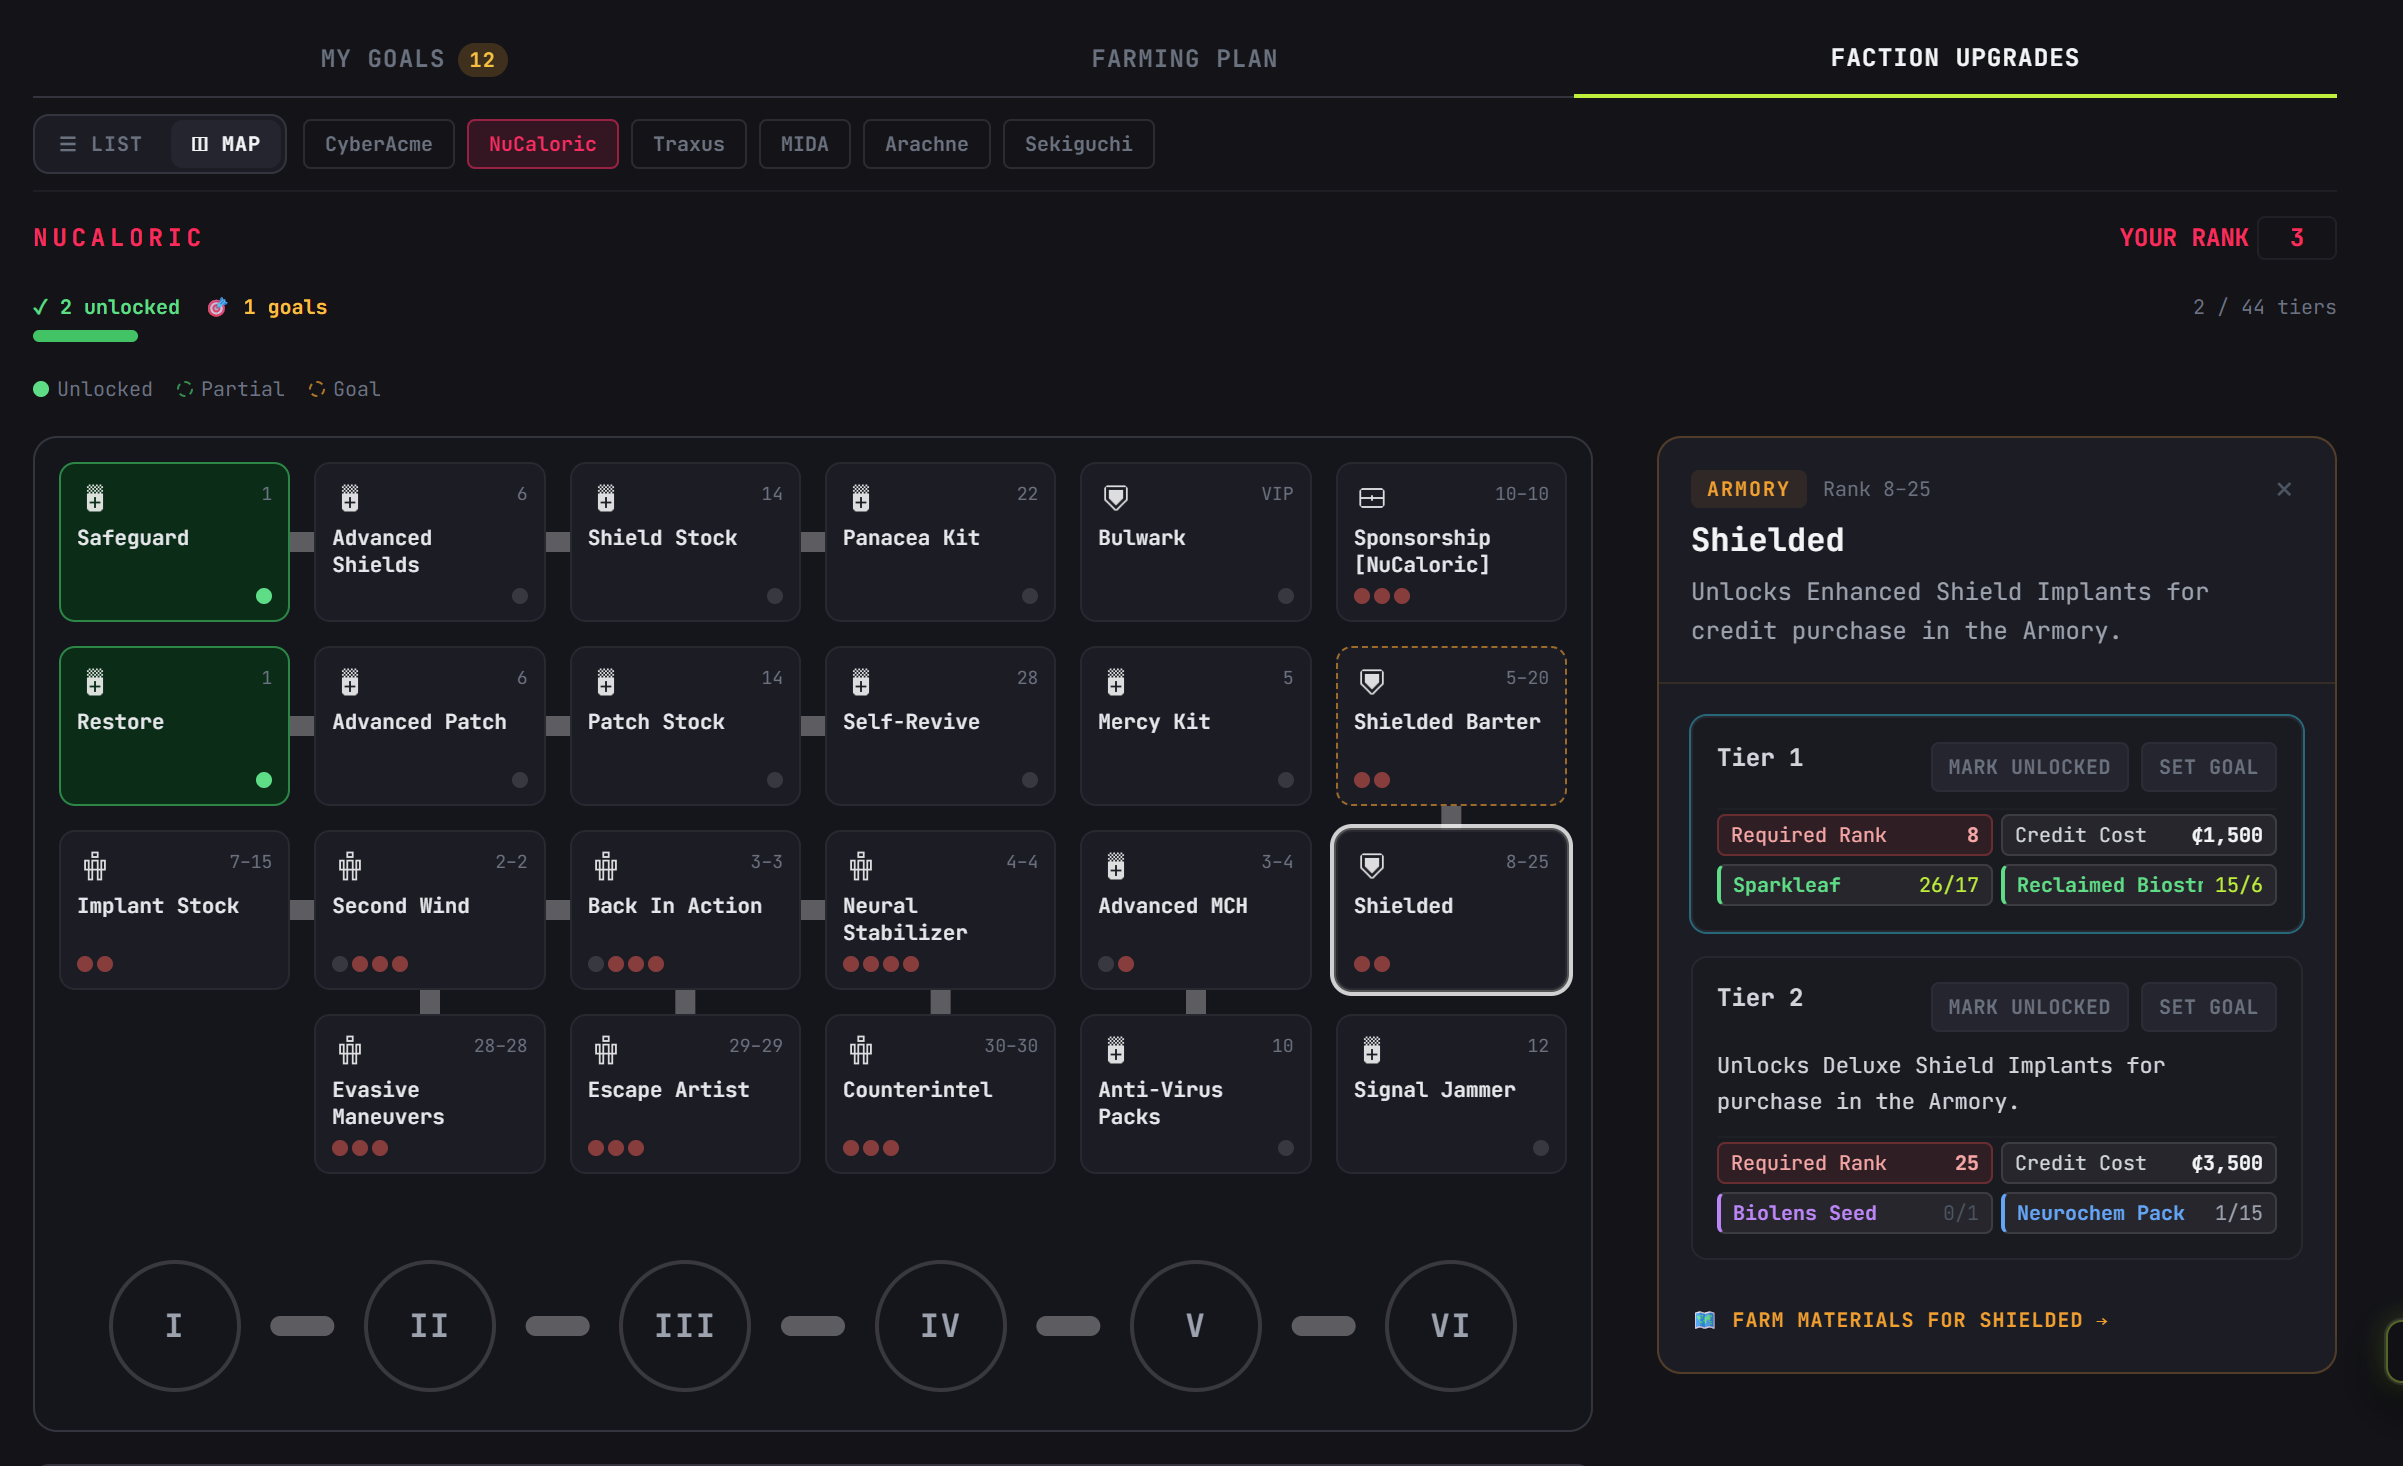
The Map View matches the upgrades trees you’d find in game. Click a node to see all of its tiers, their material costs, credit costs, and rank requirement. You can again set a tier as unlocked or as a goal from this view.
Step 3: Track Your Goals
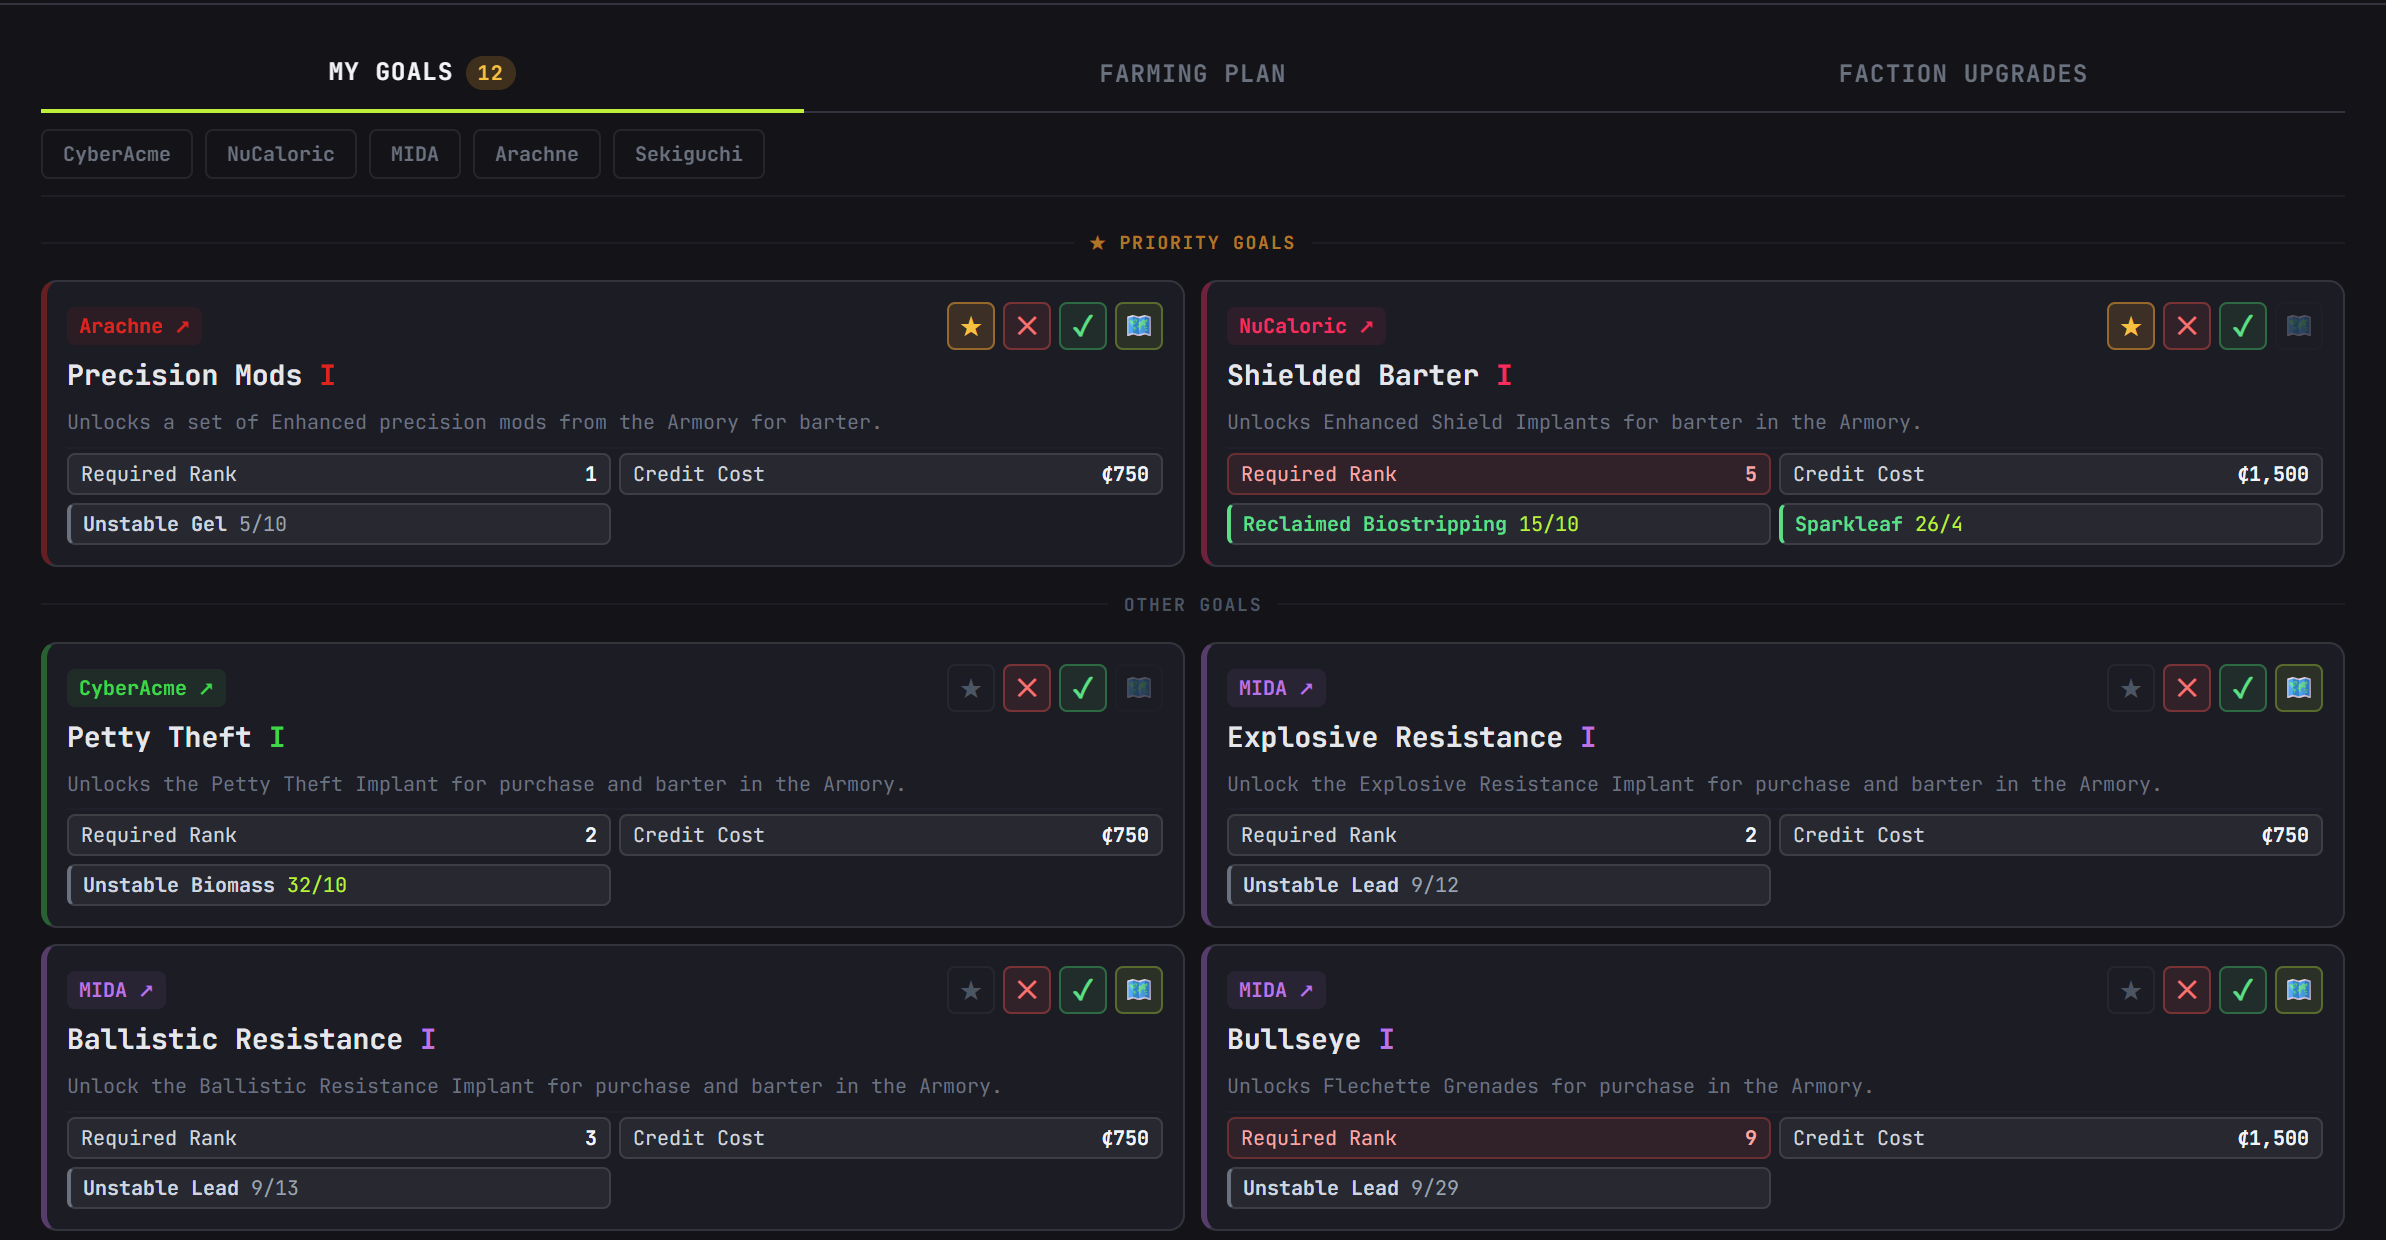
Switch to the My Goals tab. Every tier you've set as a goal is listed here with its requirements. You can see your current material counts versus what's needed, the credit cost, and the faction rank requirement.
If you have a small set of upgrades you're actively working toward, mark them as priority goals (★). These goals will now appear at the top of the My Goals list until you mark them as unlocked, allowing you to more easily focus on them.
Step 4: Check the Farming Plan
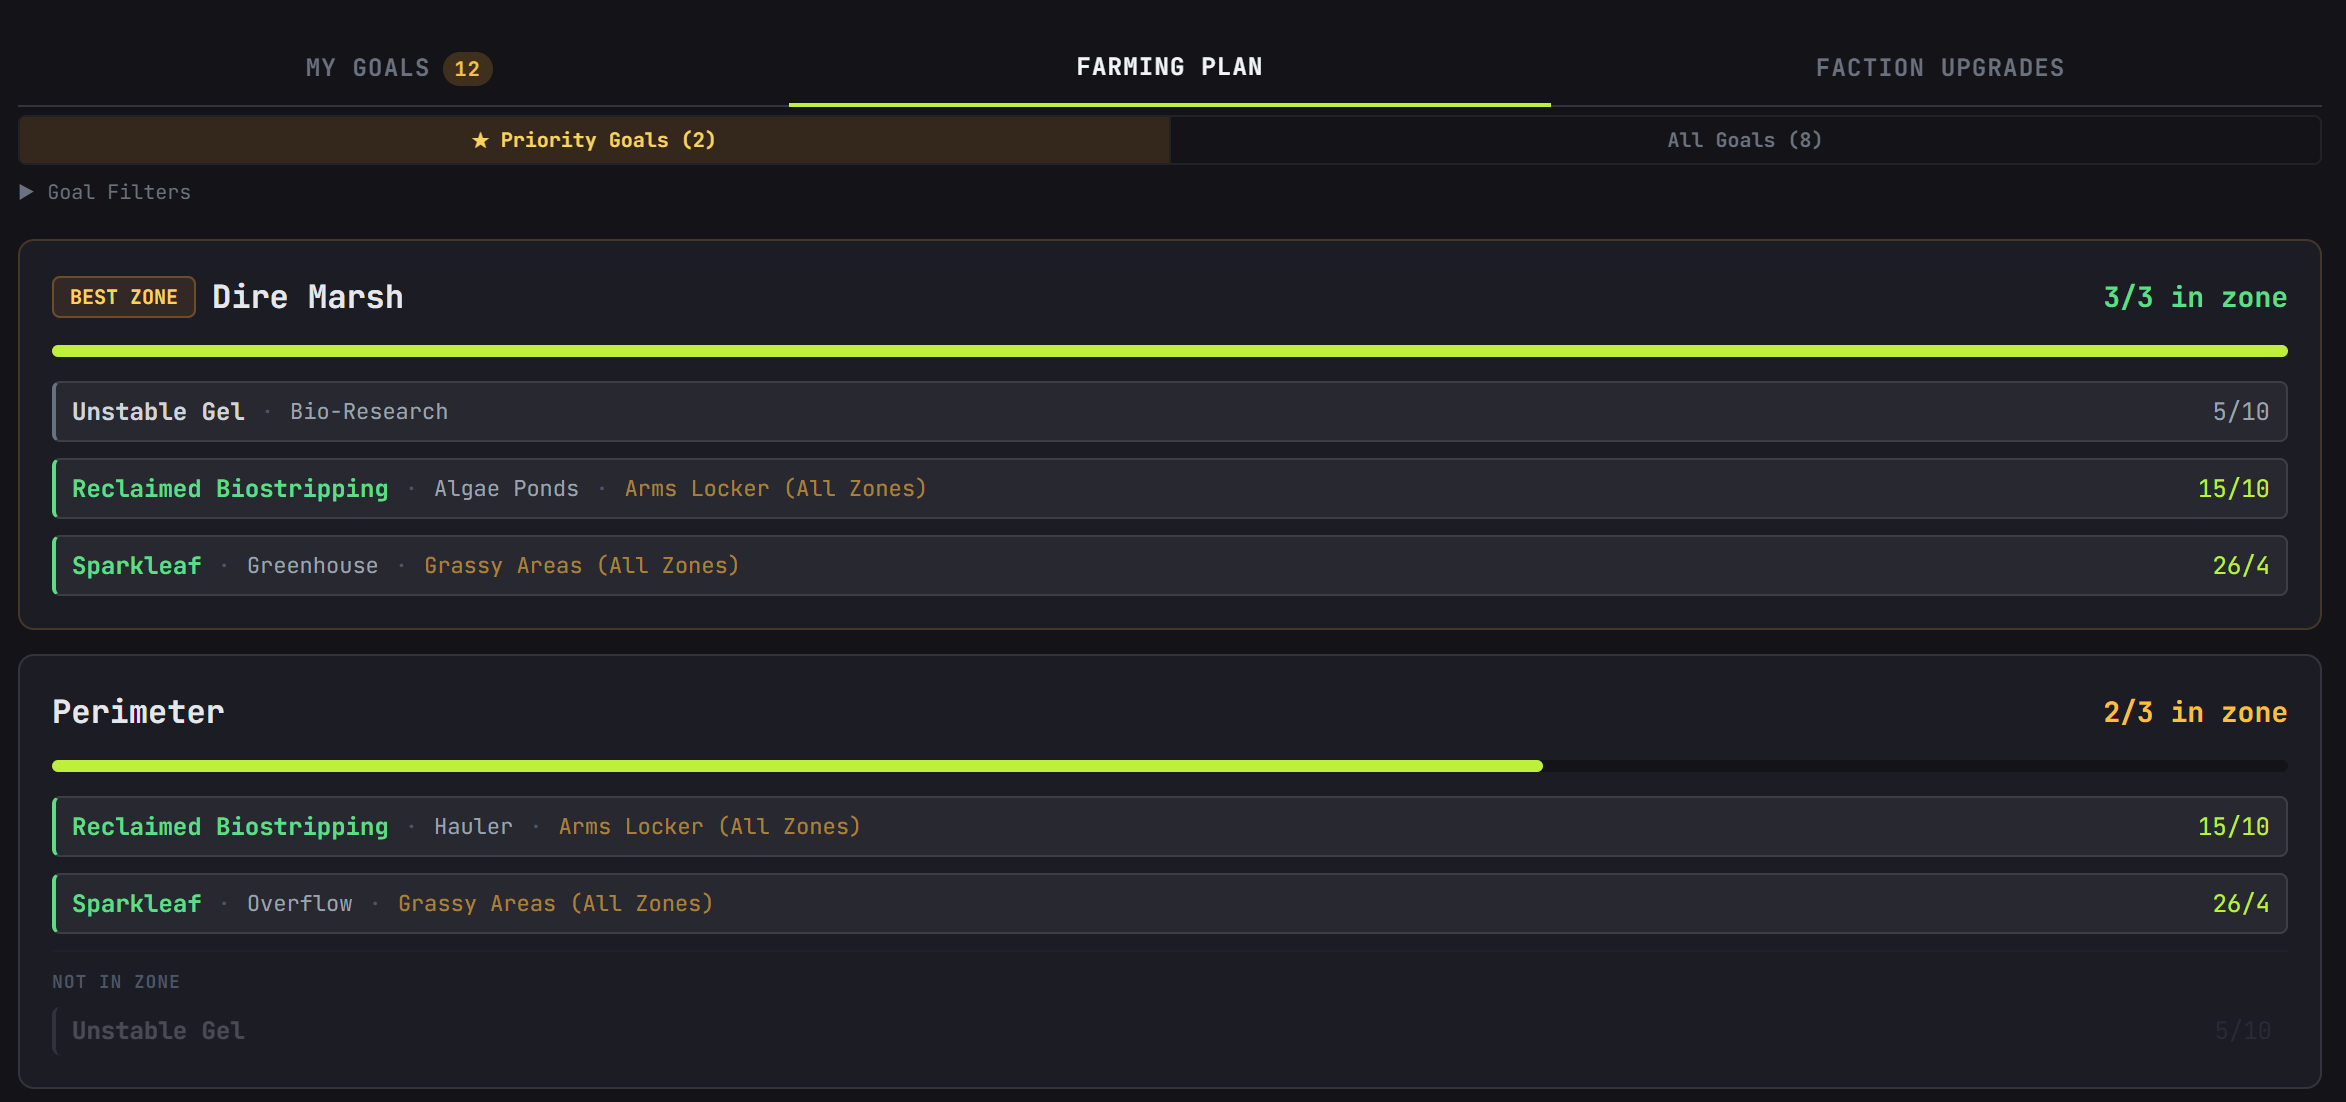
The Farming Plan tab takes your goals and generates a ranked list of zones, showing which ones give the best return for what you actually still need. It will also give you a breakdown of what areas within that zone will provide you with each specific material, so you’re not wandering around aimlessly.
You can toggle between All Goals and Priority Goals here - priority mode shows only the zones that drop materials for your starred upgrades.
When to Update
Typically I mark goals or upgrades as unlocked as I play, and will update Faction Ranks as I play as well. At times I also update my Material counts between runs, especially if my squad mates are taking time building a loadout up. I always make sure to update all of my Material counts and Faction Ranks at the end of a play session. That allows me to spend time in between play sessions figuring out what goals I want to work towards next, and lets me get everything ready to roll for when I sit down to play the game next.
The system saves locally instantly, so nothing gets lost no matter when you choose to update. Unfortunately, this is not automated yet, but I hope Bungie gives us an API to work with soon!
Material Tracker Tabs
Inside the Your Materials card:
- Goals - shows only materials needed for tiers you've marked as goals. Toggle All / Priority to focus.
- All Materials - all salvage across all factions, with their total requirement shown for all upgrades combined. Sort by Rarity (lowest first) or Quantity (most needed first).
- By Faction - breaks materials down per faction. See what CyberAcme needs vs MIDA at a glance.
Rank-Lock Indicators
If you're tracking faction ranks, the upgrade maps and lists automatically check each tier's rank requirement against your current rank. Tiers you can't unlock yet show with a red tint. Try to unlock one and you'll be prompted to type in your new rank - enter it if it got out of sync and the tier will then be shown as unlocked.
Putting It Together
Here's what a full session looks like in practice:
- Before you queue up, check the Farming Plan to know which zone to run first.
- After a few runs, open the Progression Tracker and update any material counts that changed.
- When you unlock a tier in-game, mark that upgrade as unlocked either in My Goals or in Faction Progression tab.
- If your rank went up with a Faction, type the new number in the rank input.
- End of session: do a full pass - update everything, review your goals, and check what you want to target next time.
The system is built to be low-effort. Set your ranks once, update materials as you go, and let the farming plan tell you where to head next. Between the Progression Tracker, the Material Finder, and the Cheat Sheet, you have everything you need to plan your Season 2 progression without ever reaching for a spreadsheet.
I hope this helps you guys, it was made with a lot of love to be as useful as possible.
I’ll see y’all on Tau Ceti!
- Josh